

Padel hazır duruş konusu, çoğu oyuncuya “temel” göründüğü için orta-ileri seviyede ihmal edilir. Oysa seviye yükseldikçe top hızlanır, süre kısalır ve aynı anda hem camdan dönen hem filedeki rakipten gelen toplara cevap vermek gerekir. Bu koşullarda vuruşun kalitesi, çoğunlukla temastan önceki yarım saniyede nasıl durduğunla belirlenir.
In this article we look at small mistakes that are common on a court like O’Padel Sky too, and how to fix them: legs that stand too upright, a racket that droops low, a split step done at the wrong moment, and starting the preparation too late.
To see why the ready position matters so much, it is enough to rethink your own mistakes during a match. The balls intermediate-advanced players miss are mostly not unreachable ones; they are balls where the first step started a beat late, the racket was prepared a moment late, or the weight stayed on the wrong foot. In other words, the problem is mostly not in stroke technique but in the road leading to the stroke.
Feet and Knee Position
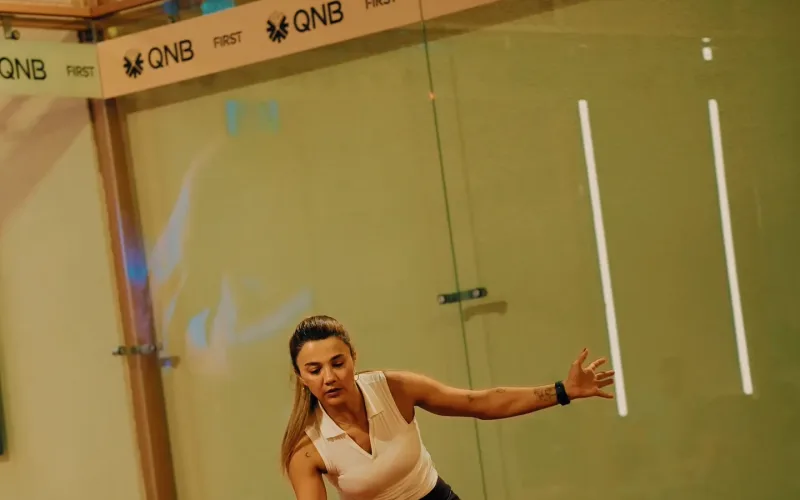
In the ready position the feet should be slightly wider than shoulder width, with the weight on the front half of the foot. A player leaning on the heels loses a moment on the first step, because the weight has to move forward first. Knees should be slightly bent and the torso slightly forward; crouching too deep is tiring and slows movement.
A practical check: stand “alive,” like an athlete who is tapping the floor without noticing. If you feel a slight tension in the soles of your feet, you are in the right place. If there is no tension, the body has already switched to rest mode and you need an extra phase to get moving once you see the ball.
Where Should the Racket Be?
The racket head should sit close to chest height and in front of the body in the ready position. A player whose racket hangs below the waist has to bring it up first when receiving a ball near the net. This movement takes only a few hundred milliseconds, but at the net that time is often the point itself.
The second hand can rest beside the racket hand, lightly touching the throat of the racket. This makes both the preparation speed and the transition between forehand and backhand easier. Holding the racket loosely instead of tightly also keeps the acceleration you need when entering the stroke.
- Racket head at chest height, in front of the body
- Elbow not far from the torso, slightly bent
- Eyes on the opponent’s racket and body, not only on the ball
- Second hand on the racket throat, ready for a fast switch
The ready position also changes a little with location. In the back court, a somewhat lower and wider stance is needed for balls rebounding off the glass, whereas at the net a more upright, narrower stance with the racket higher works well. What both zones share is a body ready to move and eyes that stay on the opponent.
When moving with a partner, the ready position also creates a shared rhythm. When both players split step together, covering space and sliding become easier. To build this sync, you need to follow not only the ball but also your partner’s feet with peripheral vision.
Split Step: A Timing Question
The split step is a small hop done at the moment the opponent hits the ball. The goal is not to jump high but to have both feet on the ground at contact, with the body ready to move in any direction. Most players do the split step either too early or too late; if it is early you land and drift back into rest, if it is late you are still in the air when the ball arrives.
For the right timing, watch the opponent’s racket. Start your hop as the opponent accelerates the racket forward to hit. When you land, you can read the direction of the ball and take the next step immediately. This timing feels artificial at first, but it becomes automatic with repetition.
The First Step and Reading Direction
The direction of the first step can largely be read from the opponent’s racket face and body angle. An opponent whose weight is back will play a lob or a defensive ball; an opponent who prepares the racket late usually sends an uncontrolled ball. You do not need to memorize these signs one by one; simply focusing on the opponent lets the brain learn the patterns on its own.
The most common mistake in the first step is crossing the feet. To move to a ball at the side, you should start by opening the foot on that side rather than the leading one. Short, quick, balanced steps bring you to the ball more effectively than long, hurried ones and keep the body controlled at the moment of the shot.
- Knees and ankles are kept alive with small steps
- Eyes go from racket to ball and back to the opponent
- After each point you consciously return to the same stance
- Racket height is maintained even when tired
Starting Shot Preparation Early
Racket preparation should begin without waiting for the ball to pass you. As soon as the opponent hits and you understand which side the ball is heading to, start the shoulder turn and take the racket back. This early preparation lets you enter the stroke with the right rhythm and choose the contact point without rushing.
Preparation is slightly different for balls that come off the glass. Instead of waiting for the ball to hit the glass and then moving, it is safer to predict the impact point in advance and take position. Keeping the racket ready early also leaves room for adjustment when the ball bounces unexpectedly.
A short addition here: recovery after the shot is part of the ready position too. After sending the ball you need to move into the next stance at once without dropping the racket. Many players stop after a good shot and watch the result, yet the opponent’s answer is often shaped in those two seconds. Restarting the preparation the moment you finish the stroke turns the rhythm of the rally in your favor.
Short, fast-changing rallies are the best way to improve this recovery. During four-player volley exchanges near the net, watch not only the ball but also the stance between every shot: did the racket drop, did the weight drift back? This attention makes a difference within a few weeks.
How to Practice It
There is a simple exercise to improve the ready position that can be done almost alone: start short-distance volleys with a partner and consciously return to the same stance after every ball. After a few minutes the ready position settles in as a habit. Doing the same exercise while focusing on the partner’s racket also improves your reading skill.
In matches, check yourself for one second at the start of each point: is my weight forward, is my racket ready, are my eyes on the opponent? When these three questions become a reflex, the game starts to flow more calmly and accurately. If you have a joint or muscle problem, consult your physician or coach.
Finally, the ready position has a mental side as well. A calm and ready stance projects the player’s confidence outward. An opponent who sees a pair standing still and balanced hurries and makes riskier choices. You get this effect not by calculation but as a by-product of a good habit.
FAQ
Do I need a split step before every ball?
Ideally yes, before every ball the opponent hits. When you are tired or the ball is far away, a small weight transfer can serve the same purpose.
Why should the racket be up at the net?
Because reaction time at the net is very short. Keeping the racket ready reduces the movement you spend to meet the ball and makes the volley more controlled.
Does the ready position tire the legs a lot?
Not when done correctly. Crouching too much is tiring; waiting with slightly bent knees and a relaxed stance is sustainable.



 Padel Courts
